Kicking off with hemming foot for stitching machine, this system is a must have for stitching fans and professionals alike. On this article, we’ll take a more in-depth have a look at the parts of a stitching machine, the aim of a hemming foot, and its widespread makes use of in garment building.
We’ll additionally discover the various kinds of hemming ft obtainable, together with blind hemming ft and rolled hemming ft, and focus on their distinctive options and appropriate materials. Moreover, we’ll cowl the set up and operation of a hemming foot, share professional ideas for reaching an ideal hem, and clarify how one can troubleshoot widespread points which will come up.
Introduction to the Hemming Foot for Stitching Machine

The hemming foot for a stitching machine is a tool that attaches to the presser foot of the machine, permitting for exact management when making a sewn hem on material. Most stitching machines come outfitted with a fundamental set of removable presser ft, which serve particular functions in garment building.
The essential parts of a stitching machine sometimes embrace:
*
The Principal Physique of the Stitching Machine, Hemming foot for stitching machine
The principle physique accommodates the motor, the spool pins, and the take-up lever, permitting for the machine to perform and thread to be pulled via the machine.
*
The Presser Foot
The presser foot strikes up and down, together with the machine’s needle, to information the material and preserve a constant seam width.
*
The Bobbin
The bobbin is used to carry the decrease thread in place beneath the material. The bobbin spins when the machine is in use.
*
The Needle
The needle punctures the material to stitch it collectively. A wide range of needle sizes and kinds can be found for various materials and duties.
*
The Thread Information
The thread information is the steel or plastic system that feeds the thread to the needle and pressure discs, which information the thread via the machine.
A hemming foot performs an important function in garment building by offering precision when making a sewn hem on material. That is particularly helpful when working with delicate or slippery materials, akin to silk or rayon, because it reduces the chance of snagging or bunching the material. The hemming foot sometimes incorporates a raised edge or a groove that matches the width of the hem, permitting for clean even urgent towards the stitching edge.
Widespread makes use of of a hemming foot in garment building embrace:
- Creating even hems on skirts, pants, and clothes.
- Attaching a hem to a garment with an ornamental edging or embellishment.
- Working with slender seams, akin to these present in lingerie or child garments.
- Including a hem to a curtain or tablecloth.
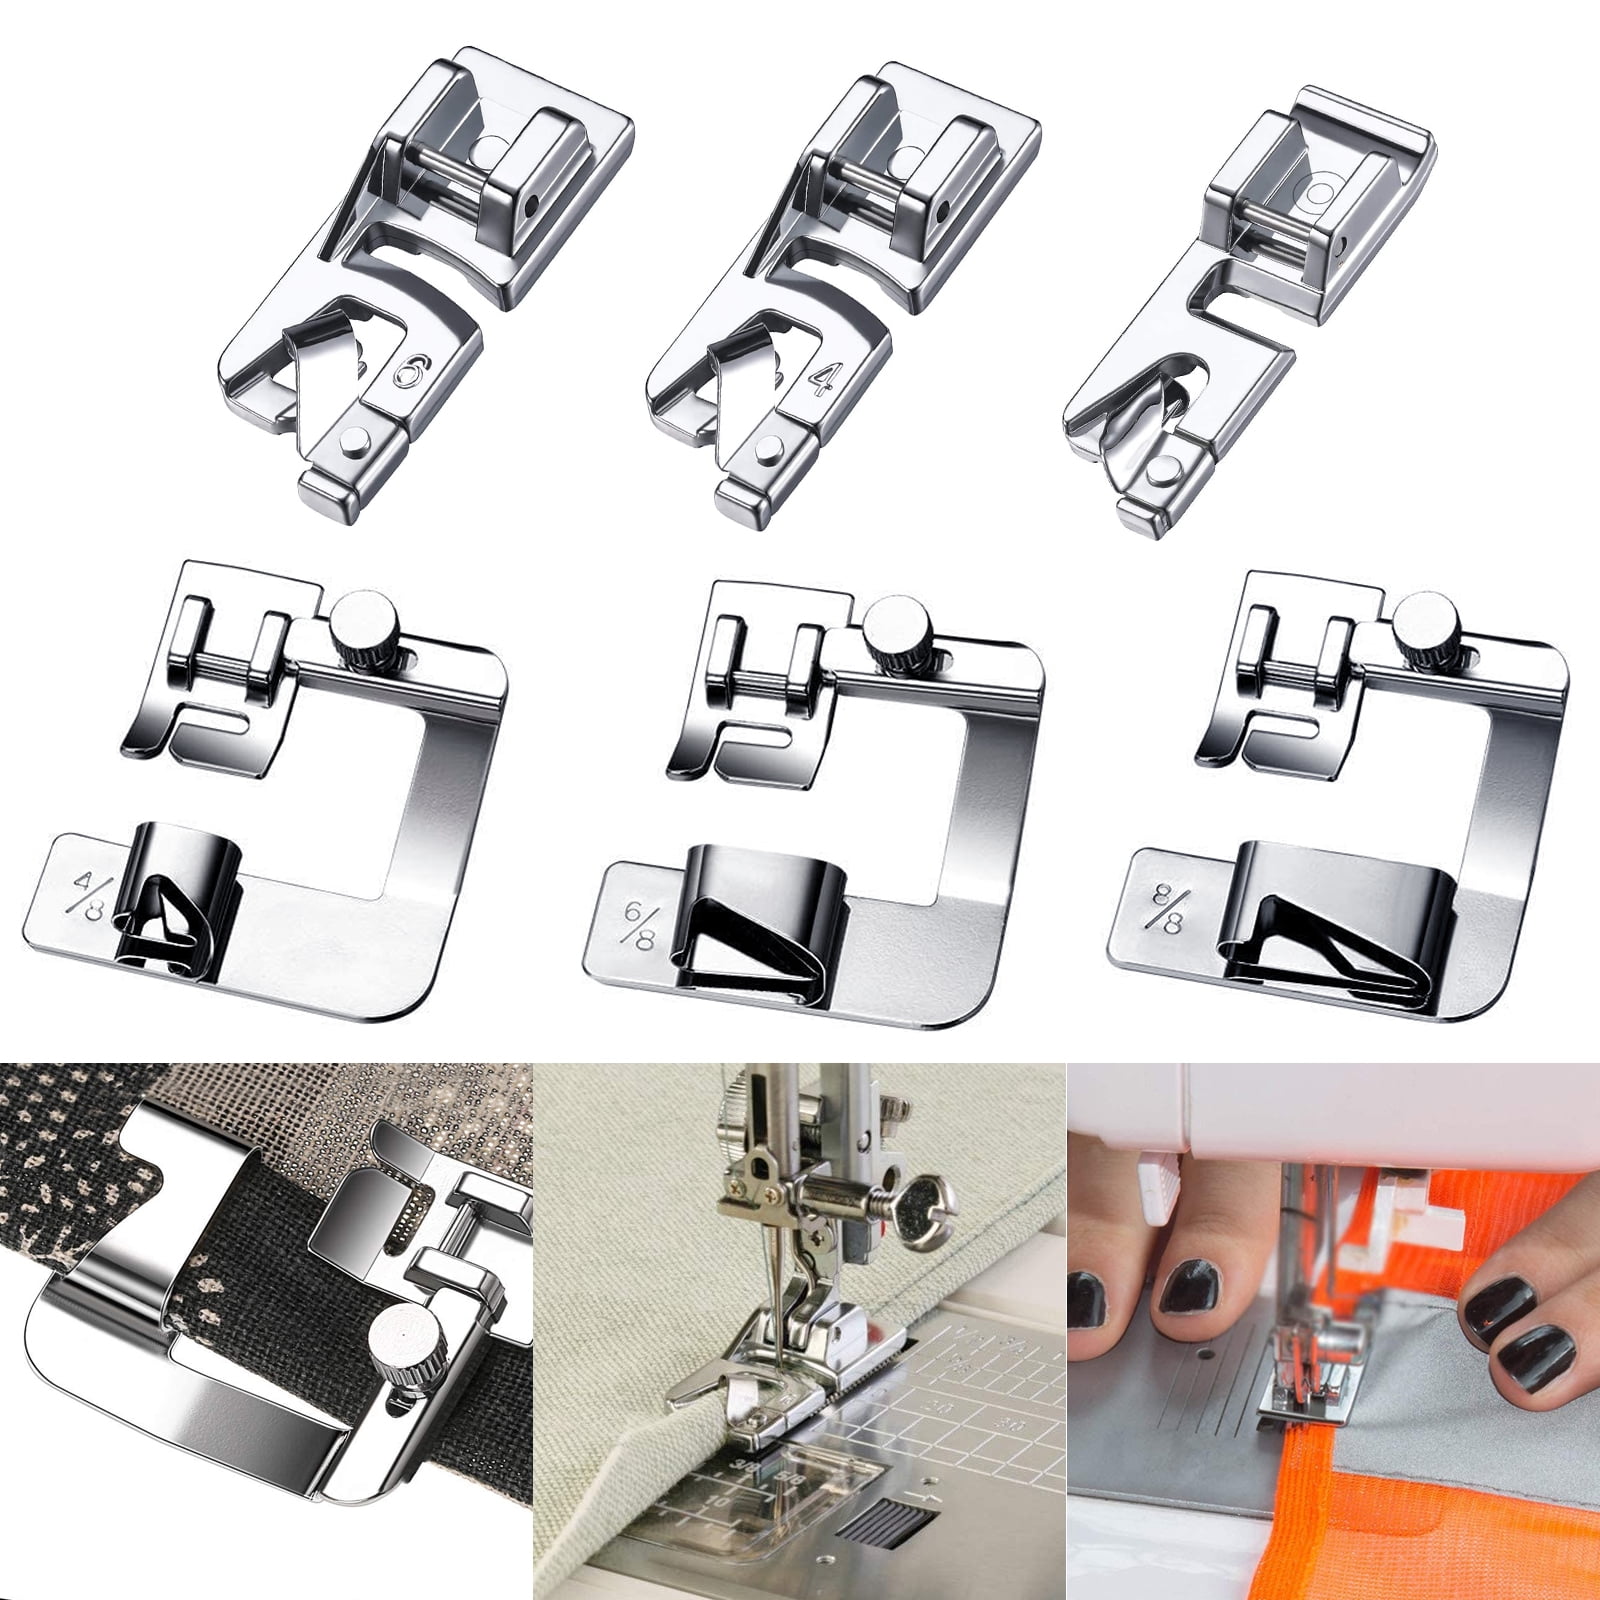
Varieties of Hemming Toes

Hemming ft are an important accent for stitching machines, enabling customers to create professional-looking hems with ease. These specialised presser ft are available in numerous sorts, every designed for particular material sorts and hem kinds.
The most typical varieties of hemming ft embrace:
Blind Hemming Foot
A blind hemming foot is right for creating invisible hems on light-weight materials, akin to silk, cotton, or voile. This foot incorporates a specialised information system that enables the material to be fed via a small opening, leading to a clean, blind hem.
- The blind hemming foot is ideal for stitching hems on clothes the place the thread should not be seen, like marriage ceremony clothes or delicate night put on.
- It is also appropriate for creating hems on sheer materials, like tulle or organza, which will be vulnerable to fraying.
Rolled Hemming Foot
A rolled hemming foot is designed for creating rolled hems on knit materials, like t-shirts or leggings. This foot incorporates a curved blade that folds the material because it’s sewn, making a clean, rolled hem.
- The rolled hemming foot is right for stitching hems on knit clothes that require a extra polished end.
- It is also appropriate for creating hems on light-weight knit materials, like child garments or sweatshirts.
Zigzag Hemming Foot
A zigzag hemming foot is appropriate for creating zigzag hems on heavyweight materials, like denim or canvas. This foot incorporates a specialised blade that creates a zigzag sew sample, which is ideal for stabilizing heavy materials and stopping fraying.
- The zigzag hemming foot is right for stitching hems on heavy-duty clothes, like work shirts or overalls.
- It is also appropriate for creating hems on thick, secure materials, like cotton twill or canvas.
Overlock Hemming Foot
An overlock hemming foot is designed for creating overlock hems on stretchy materials, like spandex or jersey. This foot incorporates a specialised information system that enables the material to be fed via a small opening, leading to a clean, overlock hem.
- The overlock hemming foot is right for stitching hems on stretchy clothes, like yoga pants or activewear tops.
- It is also appropriate for creating hems on light-weight stretchy materials, like lycra or spandex blends.
By selecting the best hemming foot on your particular stitching challenge, you possibly can obtain professional-looking hems which might be each sturdy and long-lasting.
Set up and Operation
To efficiently use a hemming foot on your stitching machine, first, it’s worthwhile to be aware of how one can set up and function it correctly. With apply, you may obtain good hems each time. On this part, we’ll cowl the steps to connect, thread, and alter the hemming foot, in addition to information you thru the method of stitching an ideal hem.
Attaching and Detaching the Hemming Foot
The method of attaching and detaching the hemming foot is comparatively simple.
When attaching the hemming foot to your stitching machine, ensure to align the foot with the machine’s socket fastidiously. It is also important to make sure the foot is securely locked in place to keep away from any accidents throughout stitching.
–
- Maintain the hemming foot with the stitching machine’s hand lever to assist information it into place.
- Flip the machine’s hand wheel whereas guiding the foot into its socket.
- Ensure it clicks into place and is safe by giving it a slight tug.
When detaching the hemming foot from the stitching machine, observe these steps:
–
- Reverse the method of inserting the foot by turning the machine’s hand wheel within the reverse path.
- Preserve a agency grip on the foot whereas guiding it out of its socket.
- As soon as safely out, you possibly can retailer the hemming foot individually from different stitching machine elements.
Threading the Hemming Foot
Threading a hemming foot requires some care to make sure the thread aligns correctly with the foot’s mechanism. This is a step-by-step information that can assist you thread your hemming foot safely and effectively.
– To string the hemming foot, first find the threading gap on the backside of the foot. You could must consult with your stitching machine’s consumer guide for the precise location.
– Take a while to fastidiously information the thread via the opening.
–
- Begin from the machine’s spool, guiding the thread on to the threading gap on the backside of the hemming foot.
- As you feed the thread, guarantee it isn’t twisted, as this might make it troublesome for the thread to feed correctly via the machine.
– Subsequent, move the thread via the machine’s pressure discs to regulate the thread correctly. Tighten the highest pressure by turning the hand wheel clockwise till it feels safe.
–
- Flip the highest pressure screw clockwise to tighten it, which helps to forestall uneven pressure on the thread.
- Modify the thread take-up lever to the proper place to be used with a hemming foot.
Adjusting the Hemming Foot’s Stress
When stitching all kinds of materials, pressure will be fairly essential to make sure a clean stitching course of. This is some essential details about adjusting the strain.
The hemming foot’s pressure can significantly have an effect on the standard of the hem you create. To regulate the strain:
– Begin by adjusting the machine’s common pressure.
– Subsequent, you possibly can fine-tune the take-up lever on the hemming foot to attain the right pressure on your particular stitching process.
– You possibly can additional refine the strain by adjusting the handwheel to ensure it clicks securely.
– By taking your time to regulate the strain, you may find yourself with hems that will not come undone.
Stitching a Good Hem
Lastly, stitching an ideal hem utilizing a hemming foot requires apply however is unquestionably achievable with endurance and dedication.
To stitch an ideal hem:
– Begin by threading your stitching machine with the hemming foot connected.
– Set your machine to the proper sew size on your particular process.
– As you start stitching, preserve a gentle tempo whereas conserving the material shifting easily beneath the presser foot.
– To make sure an ideal hem:
– Press your hem each few centimeters to forestall wrinkles from forming.
– Use the backstitch to safe any extra thread and tidy up your hem.
– All the time examine your completed hem for any defects, and make changes accordingly.
You should grasp the hemming foot to create good hems that final all through time. Maintain practising, and you will obtain the outcomes you have been dreaming of.
Hemming Foot Equipment
Utilizing a hemming foot attachment is essential for exact and clean hemming operations, permitting for exact management and adaptability in stitching numerous materials. It allows customers to create professional-looking hems, even on delicate supplies or curved edges. Correctly utilizing and sustaining the hemming foot attachment ensures optimum outcomes.
Hemming Foot Oil and Upkeep Strategies
Hemming foot oil is a specialised lubricant designed to scale back friction and forestall rust on the hemming foot. Apply a couple of drops of oil to the shifting elements of the foot after every use. Repeatedly cleansing and lubricating the hemming foot ensures clean operation and extends its lifespan.
- Oil utility:
- Wipe extra oil:
- Storage:
Use a couple of drops of oil on the shifting elements, such because the needle bar and the foot’s edge. Rotate the foot to make sure the oil spreads evenly.
Gently use a gentle material to take away any extra oil from the floor, avoiding any crevices or holes.
When not in use, retailer the hemming foot in a dry place to forestall rust and corrosion.
Cleansing the Hemming Foot
Preserve the hemming foot with mild cleaning soap and water to take away any filth or grime. Keep away from utilizing harsh chemical substances or abrasive supplies that may injury its floor.
- Soak the foot:
- Rinse and dry:
- Wipe with a gentle brush:
Combine gentle cleaning soap with heat water and soak the hemming foot for 10-Quarter-hour to loosen any filth.
Gently rinse the foot with clear water, then use a gentle material to dry it completely.
In case some cussed filth stays, use a soft-bristled brush to take away it from the floor.
Common upkeep of the hemming foot attachment preserves its unique performance and enhances efficiency, finally saving time and stopping pointless waste.
Widespread Hemming Foot Points and Options
Packing, misaligning and thread breakage are three main widespread problems to look out for. Troubleshooting these points must be performed promptly to get again to your stitching initiatives rapidly. Listed here are some sensible steps to observe in resolving these issues.
Puckering Points
Puckering is often brought on by uneven or unbalanced material, pressure setting, incorrect thread utilization, incorrect pressure settings, or a hemming foot arrange which isn’t appropriately adjusted. In the event you’re experiencing puckering when hemming together with your foot, it is price checking these areas, then make any obligatory changes to get your required look.
To keep away from puckering, try to be making use of the proper thread measurement and make sure that you’ve set the proper pressure stage earlier than stitching. Make the adjustment for the strain, if wanted. Guarantee your material is of constant evenness.
Thread Breakage
Thread breakage is often on account of extreme pressure on the thread or the foot isn’t correctly adjusted on your stitching machine. You too can expertise thread breakage when your foot isn’t suitable with the machine.
The primary possibility is to examine the needle and thread to make sure there are not any obstructions in your stitching space. Examine for the thread pressure, as too tight of a thread may very well be leading to thread breakage. Lastly, be certain that your foot is correctly aligned for the most effective stitching expertise. In case your thread continues to be broken, then it could be time to switch it.
Closing Abstract
In conclusion, a hemming foot is an important software for stitching fans and professionals. With the proper ideas and methods, you possibly can obtain an ideal hem each time and take your stitching expertise to the following stage. Whether or not you are a newbie or an skilled sewer, this text goals to offer you helpful insights and data that can assist you grasp the artwork of hemming.
Question Decision
What’s the objective of a hemming foot?
A hemming foot is used to create an ideal hem on clothes by guiding the material because it’s sewn, making certain a clean and even end.
Can I exploit an everyday stitching foot for hemming?
No, a hemming foot is particularly designed for hemming and has options that permit for an ideal hem, akin to guides and pressure management. An everyday stitching foot might not produce the identical outcomes.
How do I select the proper sort of hemming foot for my material?
The kind of hemming foot you want is determined by the material you are working with. For instance, a blind hemming foot is right for skinny materials, whereas a rolled hemming foot works nicely for heavier materials.
Can I exploit a hemming foot on my Brother stitching machine?
Sure, many Brother stitching machines are suitable with hemming ft. Be sure you examine your machine’s guide or producer’s web site for compatibility info.
How do I alter the strain on my hemming foot?
Adjusting the strain in your hemming foot is often a matter of turning a dial or screw. Seek advice from your machine’s guide or producer’s web site for particular directions.

