With easy methods to bind a quilt by machine on the forefront, this process opens a window to a tremendous begin and intrigue, inviting readers to embark on a journey to grasp the machine binding expertise and save time. The machine binding method is commonly neglected, however it’s really a incredible means so as to add an expert contact to your quilts whereas saving effort and time.
The primary goal of this text is to interrupt down the whole technique of machine binding a quilt, making it simple for inexperienced persons to observe and extra skilled quilters to enhance their expertise. From understanding the fundamentals of machine binding to troubleshooting widespread points, you’ll learn to obtain a gorgeous and professional-looking end.
Understanding Machine Binding Fundamentals: How To Bind A Quilt By Machine

Machine binding a quilt is a well-liked technique used to complete the perimeters of a quilt, offering a clear {and professional} look to the completed product. This course of includes stitching the perimeters of the quilt to a backing materials utilizing a stitching machine. Compared to hand binding, machine binding is usually sooner and extra constant.
The advantages of machine binding embody its pace, consistency, and the power to make use of quite a lot of sew sorts. This makes it best for giant or advanced quilts, the place hand binding could also be time-consuming and labor-intensive.
Machine Binding vs. Hand Binding
- Pace: Machine binding is quicker than hand binding, making it appropriate for giant or advanced quilts.
- Consistency: Machine binding produces constant stitches, which is necessary for sustaining the integrity of the quilt.
- Sew Choices: Machine binding permits for quite a lot of sew sorts, together with straight sew, zigzag sew, and ornamental sew.
The Advantages of Machine Binding
- Consistency: Machine binding produces constant stitches, which is necessary for sustaining the integrity of the quilt.
- Quicker Completion: Machine binding is usually sooner than hand binding, permitting you to finish your quilt challenge shortly.
- Skilled End: Machine binding offers a clear {and professional} look to the completed product.
| Scenario | Very best Machine Binding Methodology |
|---|---|
| Giant Quilts | Quilts with numerous seams and layers. |
| Complicated Quilts | Quilts with intricate patterns and a number of layers. |
Selecting the Proper Sew Kind
- Straight Sew: Appropriate for quilts with easy patterns and straight seams.
- Zigzag Sew: Appropriate for quilts with zigzag seams or ornamental edges.
- Ornamental Sew: Appropriate for quilts with intricate patterns and ornamental edges.
Selecting the Proper Machine and Equipment
Relating to machine binding a quilt, deciding on the suitable stitching machine and equipment is essential for reaching professional-looking outcomes. An acceptable machine will make the method simpler, sooner, and extra environment friendly.
A longarm quilting machine or a devoted quilting machine with a built-in information is usually probably the most handy choice, however not everybody has entry to those specialised machines. On this case, a daily stitching machine may also be used. Nonetheless, it could take some extra time and persistence to bind the quilt.
Forms of Stitching Machines Appropriate for Binding Quilts
There are a number of kinds of stitching machines appropriate for binding quilts, together with:
- Longarm quilting machines: These machines are particularly designed for quilting and supply the perfect outcomes. They’ve a big mattress and a built-in information, making it simple to maneuver the quilt and obtain a straight sew line.
- Free-arm stitching machines: These machines have a detachable stitching arm, which makes it simpler to stitch round curves. They are perfect for quilts with rounded or irregular shapes.
- Computerized stitching machines: These machines provide superior options like automated thread chopping, built-in strolling ft, and adjustable sew size. They’re versatile and can be utilized for quite a lot of stitching duties, together with quilting.
- Easy straight-stitch machines: These machines are cheap and straightforward to make use of. Nonetheless, they might not provide as many options as different machines, and the sew line is probably not as straight.
Choosing the proper machine relies on the kind of quilting you propose to do and the scale of your quilt. In the event you’re new to quilting, a beginner-friendly machine with automated options could also be a great choice.
Thread High quality and Shade Choice for Binding
Thread is a vital a part of the binding course of, and selecting the best thread could make an enormous distinction within the look of your quilt.
“Thread is the spine of your stitching, and the suitable thread can add power and sturdiness to your seam.”
Listed below are some ideas for selecting the best thread for binding:
- Search for threads particularly designed for quilting, similar to cotton or polyester threads. These threads are sturdy and proof against fraying.
- Choose a thread colour that enhances the colours in your quilt. You’ll be able to select a thread that matches the material, or a contrasting thread to create an ornamental sew line.
- Think about using a thread with a built-in end, which may also help to cut back fraying and add shine to your stitches.
Essential Instruments and Equipment for Machine Binding
To get the perfect outcomes from machine binding, you will want some important instruments and equipment.
- Seam rulers: Seam rulers are used to measure and mark your seam allowance. They’re particularly helpful when binding a quilt with a posh design.
- Binding clips: Binding clips are used to carry the binding in place whilst you sew. They arrive in varied sizes and are particularly helpful for lengthy strips of binding.
- Strolling ft: Strolling ft are attachments that match onto your machine, permitting you to stitch over lengthy distances with out the material getting pulled or twisted.
- Edge guides: Edge guides are attachments that match onto your machine, serving to to information the material and hold it straight whereas stitching.
These instruments and equipment will make the machine binding course of simpler and extra environment friendly, serving to you to realize professional-looking outcomes.
Getting ready the Quilt for Machine Binding
Earlier than you start machine binding your quilt, it is important to organize the quilt itself. This includes trimming the quilt to the proper measurement, urgent the quilt to make sure flat and clean cloth, and getting ready the binding strips.
Trimming the Quilt
—————-
Trimming the quilt to the proper measurement includes eradicating any extra cloth across the edges. That is necessary as a result of it ensures that the binding strips will match correctly and that the quilt will lie flat.
To trim the quilt, use a rotary cutter and mat to fastidiously minimize alongside the perimeters, leaving about 1/4 inch of additional cloth across the quilt high. Then, use a ruler and stitching machine to trim the surplus cloth away, utilizing a strolling foot and even feed foot to assist information the material.
As soon as you have trimmed the quilt, press the seams flat utilizing a scorching iron and steam. This helps take away any wrinkles or creases, making it simpler to work with the quilt.
Urgent the Quilt
—————–
Urgent the quilt is a vital step within the machine binding course of. By urgent the quilt, you make sure that it lies flat and that the seams are pressed within the right route.
To press the quilt, place it on a ironing board or different flat floor and iron it utilizing a scorching iron and steam. Use a urgent fabric or a dry iron to press the seams flat, ensuring to iron from the middle of the quilt outwards.
Getting ready Binding Strips
———————-
Getting ready the binding strips includes chopping the material into the proper width and size. The usual width for binding strips is about 2.5 inches, however you possibly can modify this to fit your private desire.
To arrange the binding strips, minimize the material into strips utilizing a rotary cutter and mat. Then, use a ruler and stitching machine to chop the strips to the proper size, utilizing a rotary blade attachment to chop the strips.
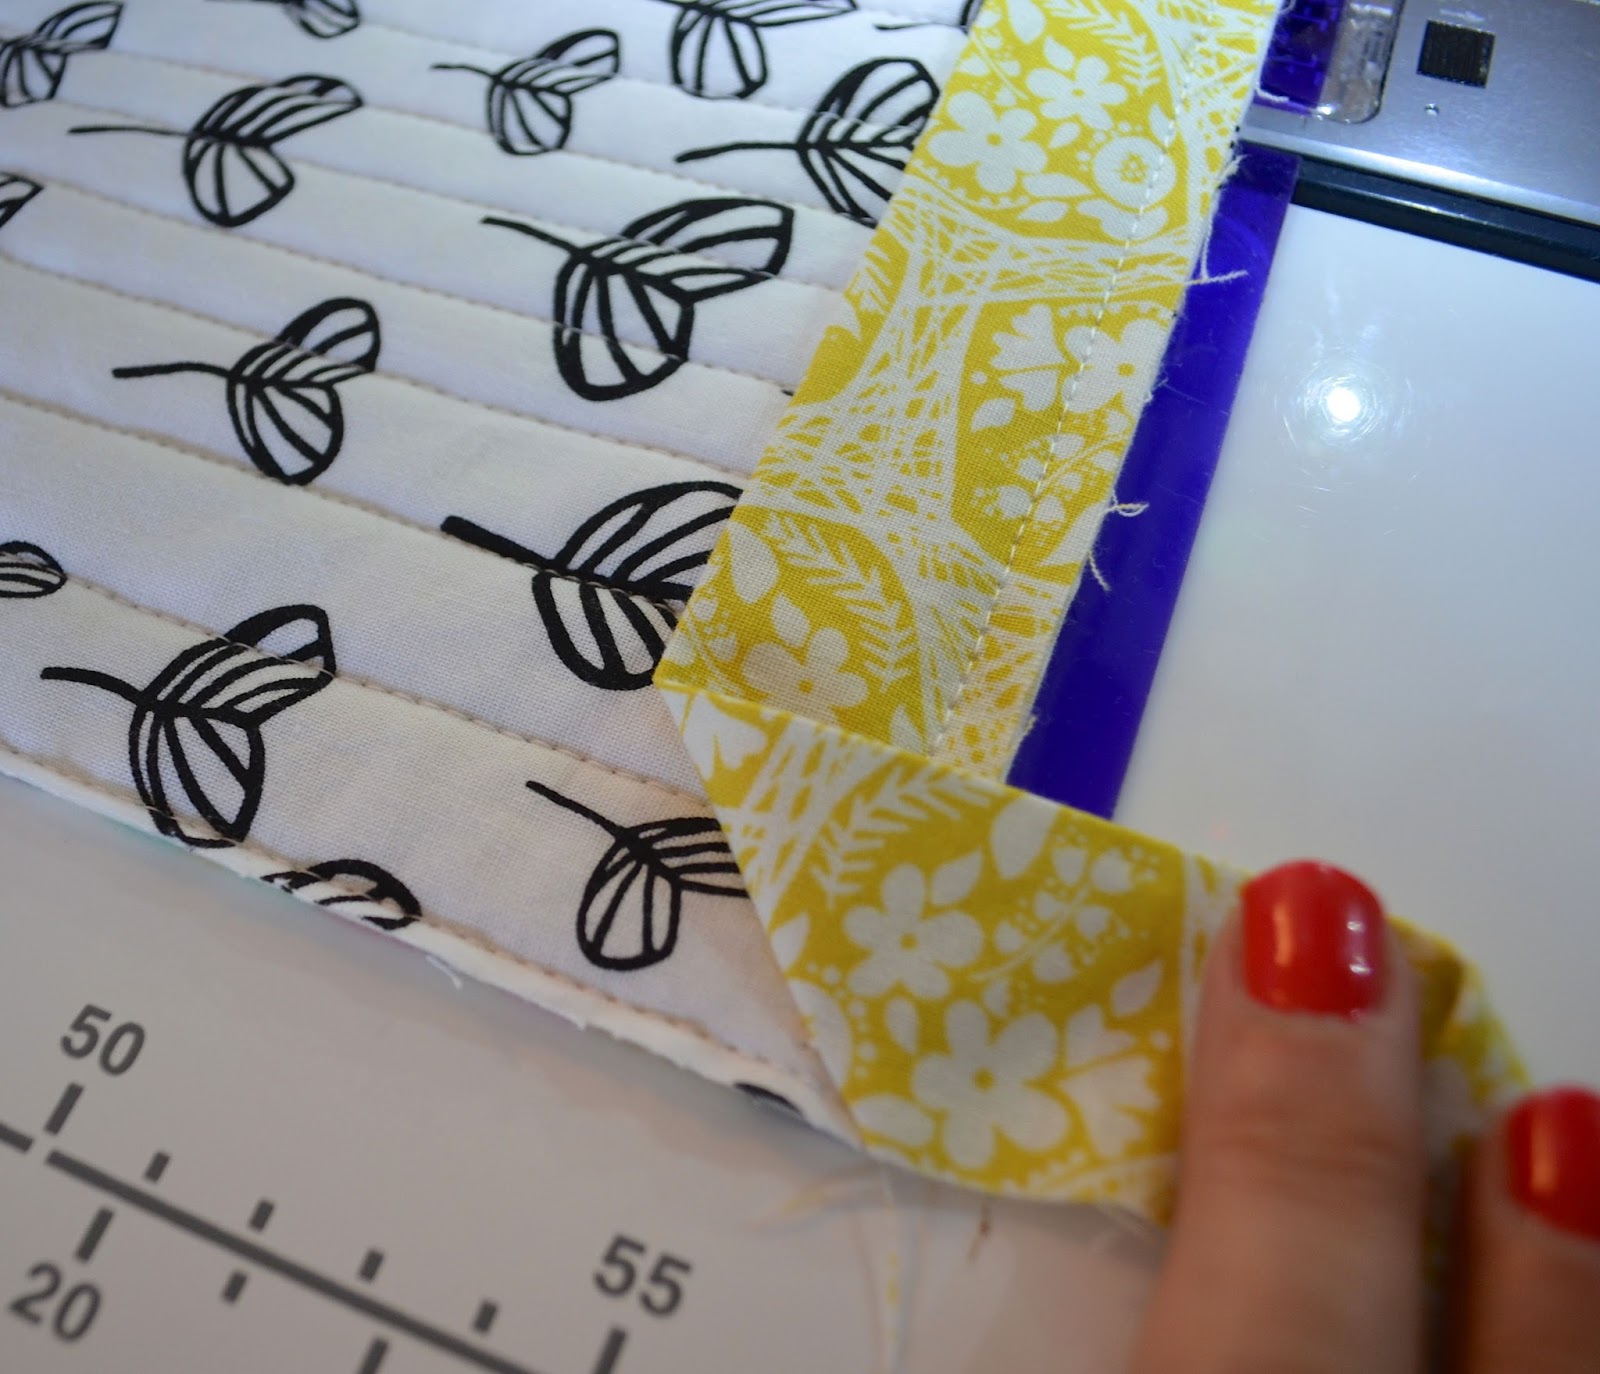
Attaching Binding Strips
————————-
To connect the binding strips to the quilt, use a strolling foot and even feed foot to information the material. Start by stitching the binding strip to the sting of the quilt, utilizing a 1/4 inch seam allowance. Then, proceed stitching the binding strip across the quilt, utilizing a constant seam allowance and sustaining a gentle tempo.
Correct Seam Allowances
Correct seam allowances are essential when machine binding a quilt. To make sure correct seam allowances, use a ruler and seam gauge to measure the gap between the sting of the quilt and the binding strip.
Keep a constant seam allowance all through the binding course of, utilizing a strolling foot and even feed foot to information the material. If mandatory, use a seam ripper to fastidiously take away any errors or errors.
Constant Edge Alignment
Constant edge alignment is necessary to take care of an expert end in your quilt. To make sure constant edge alignment, use a ruler and seam gauge to measure the gap between the sting of the quilt and the binding strip.
Keep a constant tempo whereas stitching the binding strip across the quilt, utilizing a strolling foot and even feed foot to information the material. If mandatory, use a seam ripper to fastidiously take away any errors or errors.
Machine Binding Strategies and Ideas
Machine binding is a vital step in finishing your quilt, and mastering varied strategies can considerably improve the general look and sturdiness of your completed challenge. By understanding the fundamentals of machine binding, you will be properly in your technique to creating lovely and professional-looking quilts.
BASIC MACHINE BINDING STITCH
The essential machine binding sew is a straight sew or zigzag sew, which serves as the muse for extra advanced binding strategies. A straight sew is good for many binding functions, whereas a zigzag sew can present added safety and suppleness for areas with heavy use or stress.
When deciding on a sew, take into account the kind of cloth you are working with and the meant use of the quilt. A straight sew is appropriate for many cotton and polyester blends, whereas a zigzag sew could also be mandatory for quilts created from stretchy materials like knits or athletic put on.
SELECTING STITCH LENGTH AND TENSION
Sew size and pressure play a crucial position in reaching optimum binding outcomes. Listed below are some pointers that will help you select the suitable sew size and pressure to your machine binding:
* For many quilts, a medium-length sew (round 2-3 mm) is beneficial. This size offers a balanced mix of power and suppleness.
* For quilts with thick or dense fillings, an extended sew size could also be essential to accommodate the majority with out inflicting the material to pucker.
* Regulate the sew pressure based on the thickness of the material and the kind of thread you are utilizing. A lighter pressure is commonly appropriate for skinny materials, whereas a barely larger pressure is beneficial for thicker materials.
Navigate Curves and Complicated Shapes with Ease, Learn how to bind a quilt by machine
Binding curves and sophisticated shapes requires persistence, precision, and follow. Listed below are some ideas that will help you navigate these areas with confidence:
* Use a guiding sew, similar to a straight sew or an ornamental sew, that will help you keep on observe whereas binding curves and sophisticated shapes.
* Use a strolling foot or a free-motion foot to help with clean, even stitching.
* Apply light stress whereas stitching over curves and sophisticated shapes to keep away from distorting the material or pulling it out of form.
* Take your time and work in small, manageable sections, progressively increase your stitches to create a clean, even binding.
Mastering Corners and Angles
Corners and angles could be difficult to bind, however with follow and persistence, you possibly can grasp these areas with ease. Listed below are some ideas that will help you bind corners and angles like a professional:
* Use a brief, sharp sew (round 1-2 mm) to bind corners and angles. This size offers wonderful management and precision.
* Use a strolling foot or a free-motion foot to assist information your stitches and preserve clean, even pressure.
* Apply light stress whereas stitching over corners and angles to keep away from distorting the material or pulling it out of form.
* Take your time and work in small, manageable sections, progressively increase your stitches to create a clean, even binding.
Binding Strip Width and Placement
Relating to machine binding a quilt, the width and placement of the binding strip are essential components to contemplate. A accurately sized binding strip can improve the general look of the completed quilt, whereas an incorrectly sized strip can result in a sloppy or uneven end. On this part, we are going to discover the significance of binding strip width and talk about strategies for calculating and marking its placement.
Significance of Binding Strip Width
The binding strip width ought to be proportional to the quilt’s edges. A binding strip that’s too extensive can overwhelm the quilt and make it look cumbersome, whereas a strip that’s too slim might get misplaced within the seams of the quilt. The best binding strip width is often between 2.5 to three.5 inches (6.4 to eight.9 cm), though this may range relying on the quilt’s design and private desire.
Strategies for Calculating Binding Strip Placement
There are a number of strategies for calculating the location of the binding strip, together with:
- The Fold and Press Methodology:
- Press the fold to create a crisp crease.
- Unfold the binding strip and place it alongside the sting of the quilt, with the fold aligning with the sting of the quilt.
- Pin the binding strip in place, utilizing the fold as a information.
- The Measuring Methodology:
- Measure the width of the quilt on the designated binding edge.
- Subtract 1-2 inches (2.5-5 cm) from the measurement to account for seam allowance.
- Mark the measurement on the quilt as a information for binding strip placement.
Minimize the binding strip to the specified width and fold it in half lengthwise, with the mistaken sides collectively.
Utilizing Binding Clips or Guides
To make sure correct placement of the binding strip, many quilters use binding clips or guides. These instruments could be hooked up to the stitching machine or the quilt itself and supply a transparent reference level for positioning the binding strip. Binding clips or guides could be particularly helpful when working with massive or advanced quilt designs, as they assist to take care of accuracy and precision all through the binding course of.
Working with Totally different Quilt Materials and Textures
Quilt binding generally is a difficult process, particularly when working with thick or dense materials. Thicker materials require extra time and effort to bind, and should even require the usage of specialised instruments or strategies. Understanding easy methods to deal with totally different cloth textures is important for reaching a professional-looking end in your quilt.
Dealing with Thick or Dense Materials
Thick or dense materials could cause difficulties when binding a quilt. These kinds of materials don’t fold as simply as thinner materials, making it more durable to create a clean, seamless binding.
To sort out this situation, quilters can make use of a number of methods. First, utilizing a strolling foot and even feed foot attachment in your stitching machine may also help to maneuver the material easily and forestall bunching. Second, quilting thick or dense materials usually requires the usage of sharp, heavy-duty needles. Lastly, making use of a binding stabilizer or interfacing may also help to supply additional assist and make the binding course of extra manageable.
Working with Different Textures
Quilts created from wool or felt can current binding challenges resulting from their distinctive textures. Wool and felt materials are vulnerable to stretching and puckering, creating uneven binding edges.
A stabilizing agent, similar to a fusible interfacing, may also help to supply further assist and hold the binding in place whereas stitching. Another choice is to make use of a serger or a zigzag sew in your stitching machine, which may also help to take care of the feel of the material whereas stopping fraying. Moreover, an extended sew size and a diminished presser foot lifter can support in shifting the thicker and denser materials, permitting your stitching machine to deal with the material with better effectivity.
Utilizing Binding Stabilizers or Interfacing
Binding stabilizers and interfacing are designed to supply further assist and stability to difficult materials, making them simpler to deal with and stitch. These merchandise are sometimes utilized to the again of the material earlier than stitching the binding. The stabilizer helps to distribute the stress evenly, stopping the material from stretching or distorting because the binding is sewn. This results in a clean, even end and a professional-looking consequence.
Troubleshooting Frequent Machine Binding Points

When machine binding your quilt, it is not unusual to come across a number of hiccups. These points could be irritating, however with a little bit persistence and troubleshooting know-how, you will get your binding wanting clean {and professional}. On this part, we’ll cowl a number of the most typical machine binding points and supply ideas for resolving them.
Figuring out Puckering Points
Puckering happens when the material wrinkles or puckers up throughout the binding course of. This may be resulting from quite a lot of components, together with uneven cloth pressure, mistaken needle measurement, or utilizing a low-stitch size. To troubleshoot puckering points, begin by adjusting the material pressure in your stitching machine. Be sure that the material is feeding evenly and never too tightly, as this may trigger puckering. If the problem persists, attempt adjusting the needle measurement or sew size to see if this resolves the issue. Moreover, you possibly can attempt utilizing a strolling foot and even feed foot to assist information the material and cut back puckering.
- Test the material pressure in your stitching machine and modify as wanted.
- Use a strolling foot and even feed foot to assist information the material.
- Attempt adjusting the needle measurement or sew size to see if this resolves the issue.
Addressing Skipped Stitches
Skipped stitches can happen for quite a lot of causes, together with a unclean or clogged stitching machine, mistaken thread pressure, or utilizing a low-stitch size. To troubleshoot skipped stitches, begin by cleansing and sustaining your stitching machine repeatedly. Be sure that the bobbin space is freed from lint and particles, and the bobbin winder is clear and freed from threads. Subsequent, modify the thread pressure in your stitching machine to make sure it is not too tight or too free. Lastly, attempt rising the sew size to see if this resolves the issue.
Common upkeep of your stitching machine is essential to stopping skipped stitches and different points.
Sustaining Your Stitching Machine
Common upkeep of your stitching machine is important to stopping skipped stitches, puckering, and different points. This consists of cleansing the machine repeatedly, altering the needle and thread as wanted, and oiling the machine to maintain it operating easily. Moreover, it is important to switch worn elements, such because the presser foot and needle bar, to forestall harm to the machine and guarantee clean operation.
- Clear the stitching machine repeatedly, listening to the bobbin space and thread paths.
- Change the needle and thread as wanted, and oil the machine to maintain it operating easily.
- Exchange worn elements, such because the presser foot and needle bar, to forestall harm to the machine.
Ideas for Reaching Skilled-Grade Ending
To realize a professional-looking end in your machine-bound quilt, consideration to element is vital. Correct urgent and ending strategies could make all of the distinction in making a seamless, polished look.
Urgent the Sure Edges
Urgent the sure edges of your quilt is a vital step in reaching a clean end. This helps to flatten the seam allowances, cut back bulk, and create a crisp, sharp line. Use a scorching iron and a urgent fabric to press the binding in place, working from the middle outwards. This ensures that the binding lies flat and evenly, creating a gorgeous, professional-looking end.
Making a Seamless End
To create a seamless end the place the binding meets the quilt, use a method known as “nesting” or “lap stitching”. This includes folding the binding inwards by about 1/4 inch, making a neat, sharp nook. Then, fold the binding again out and pin it in place, ensuring the perimeters are aligned. Sew the binding in place utilizing a blind hem sew or a slim zigzag sew. This method creates an almost invisible seam between the binding and the quilt.
Including Ornamental Touches
Including ornamental touches to your machine-bound quilt can elevate it to an entire new stage. One thought is to create binding labels utilizing cloth markers or embroidery floss. These can add a private contact and make your quilt much more particular. Another choice is so as to add hand-stitching to the binding itself, utilizing a contrasting thread colour to create a gorgeous, textured look.
Ending Strategies for a Skilled End
To realize an expert end, attempt utilizing the next strategies:
- Use a strolling foot and even feed foot to forestall puckering and distortion as you machine bind.
- Use a pointy, fine-tip needle to forestall skipped stitches and thread breakage.
- Hold your threads organized and tidy to forestall tangles and knots.
- Use a measuring tape or ruler to make sure correct, exact cuts.
By following the following tips and strategies, you possibly can obtain a professional-grade end in your machine-bound quilt. With follow and persistence, you will be creating beautiful, high-quality quilts you could be proud to point out off.
Keep in mind, the important thing to an expert end is consideration to element and a willingness to take the time to do it proper.
Ending Remarks
With these steps and ideas, you are now geared up to bind a quilt by machine like a professional! Keep in mind to all the time press your seams, use the suitable binding strip width, and experiment with totally different sew lengths and tensions. Do not be afraid to make errors – they’re a possibility to study and enhance. Completely happy stitching!
Important Questionnaire
Can I take advantage of any kind of material for machine binding?
No, it is best to make use of a cloth that is comparable in weight and texture to your quilt high. It will guarantee a clean and even end. Heavier or thinner materials could cause puckering or bulkiness within the binding.
How do I keep away from puckering when machine binding?
Be sure that to iron your quilt high and binding earlier than beginning, use a strolling foot or edge information in your stitching machine, and do not pull the material as you sew. If puckering happens, take away the binding and reattach it, utilizing a shorter sew size and adjusting your pressure.
Can I take advantage of a serger or overlock machine to complete my binding?
No, whereas a serger can create a neat end, it is not best for binding a quilt. The binding must be hooked up individually with a stitching machine, utilizing a straight sew or zigzag sew. A serger can fray the binding, making it look untidy.

